Are you planning to use Google web fonts in your wordpress website? If you are going to do it manually with custom CSS then you should check out this useful plugin which makes it easy to change the typography of any html tag without any coding. We are discussing about WP Google Fonts plugin in this article which helps to use Google fonts for any html tags including heading, paragraph, list and block quotes etc. and completely change the look of your wordpress theme.
Here we have come up with the quick tutor on how to use WP Google Fonts plugin to add Google fonts to your WordPress theme.
Also read:
- How to Add Facebook Like Popup to Your Blog to Increase Facebook Likes
- How to Check if the Blog Comment is Dofollow or Nofollow?
How to Use WP Google Fonts Plugin to Add Google Web Fonts in WordPress Theme
- Login to wordpress admin panel
- Go to “Plugins >> Add new” and search for WP Google fonts plugin, or download from the link here
- Install the WP Google fonts plugin and activate it
- Now go to “Settings >> Google Fonts” page
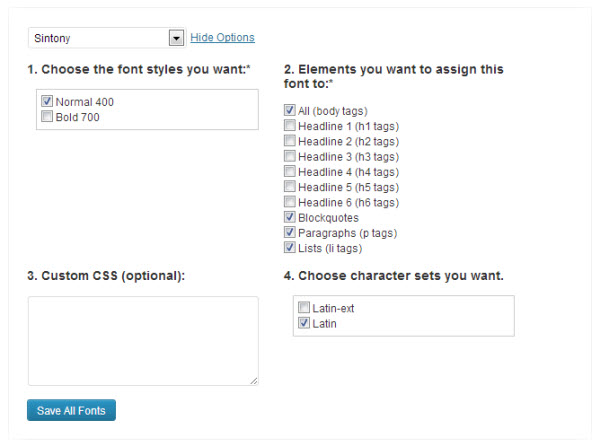
- Select the Google web font from the drop down combo and click on “Show options” link where you can select html tags such as headings and paragraph to use preferred Google font. You can also make the font bold, italic or normal as per your requirement over here.

- Once selected the html tags and done with the necessary formatting click on “Save all fonts” button, that’s it, checked headings, paragraph and list tags use the selected Google font.
WP Google Fonts plugin also comes with custom CSS field where you can add your own CSS to change the typography of particular ID or class in your wordpress theme.


